Steering wheel controls for the Mitsubishi i-MIEV (2010)
This car originally never came with the steering wheel control buttons for the audio and cruise control which was available in later Mitsubishi models. Luckily, the steering wheel was also used in the Lancer and Outlander of the 2010 era cars.
You can find these steering wheel controls aftermarket on Aliexpress and these come with the wiring harness required to connect them up. Another benefit is that these are of the simple resistor-button type which makes reading these quite easy. These are about 40 euro.
The clockspring however is not suited, it only has the horn pin connected, and the required 5 pins for the SWC buttons are not actually connected. The connector below the steering column does have 6 pins (including horn), but there is not actually a connector on the other side inside the steering wheel. The clockspring with both connectors is about 10 euro.
Disconnect the 12 Volt battery, loosen the 2 torx 30 on the side of the steering wheel, remove the airbag. Make a note of the position of the wheel, the nut and the basket. (sharpie).
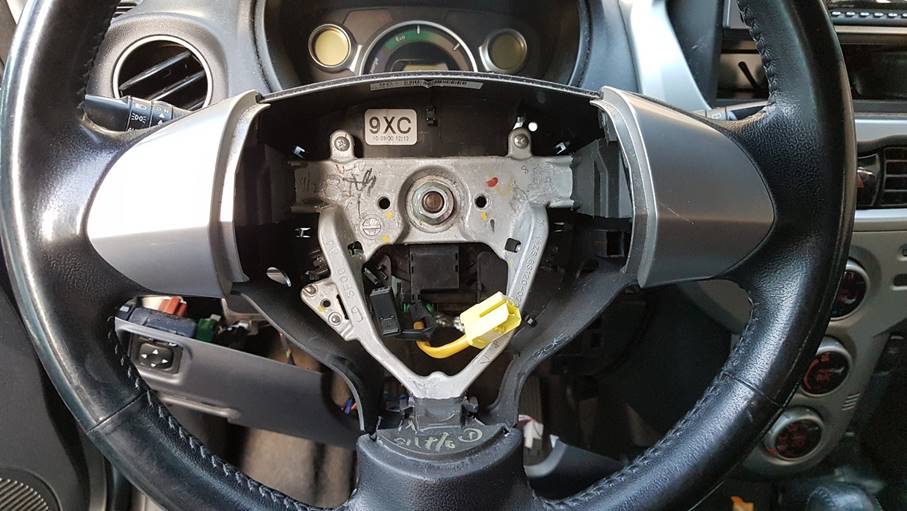
Remove the steering wheel nut (17mm) and carefully replace the clockspring.
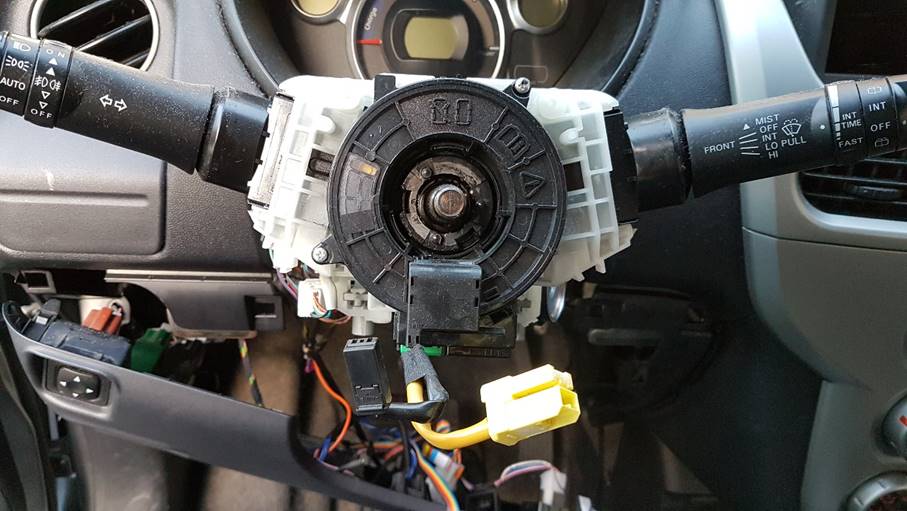
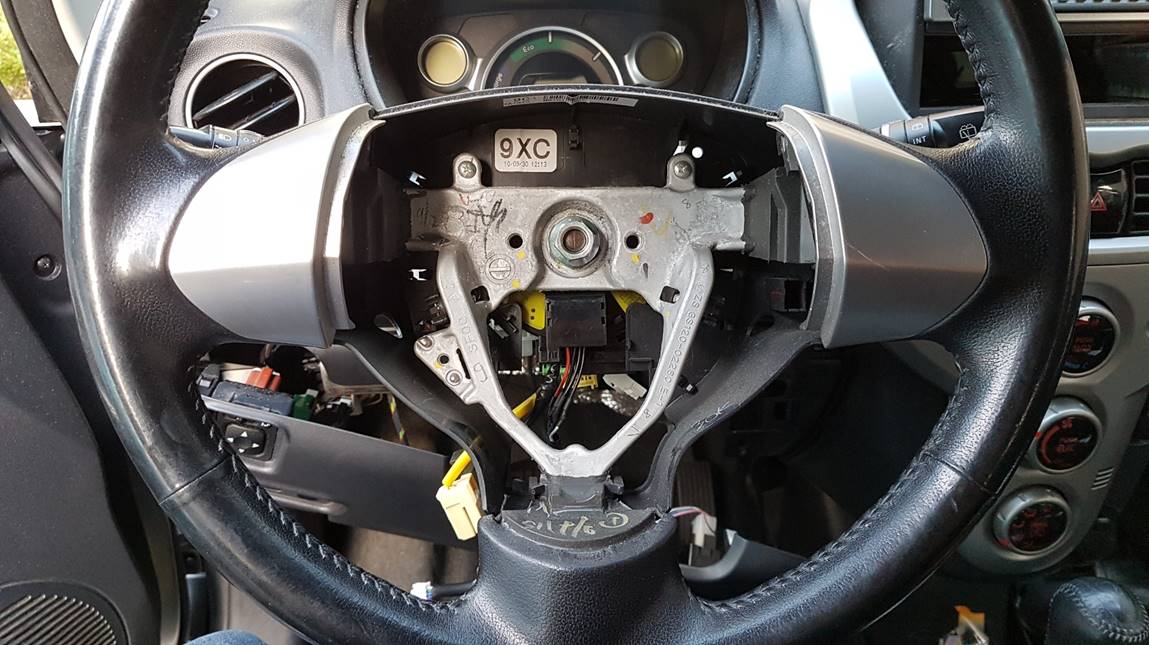
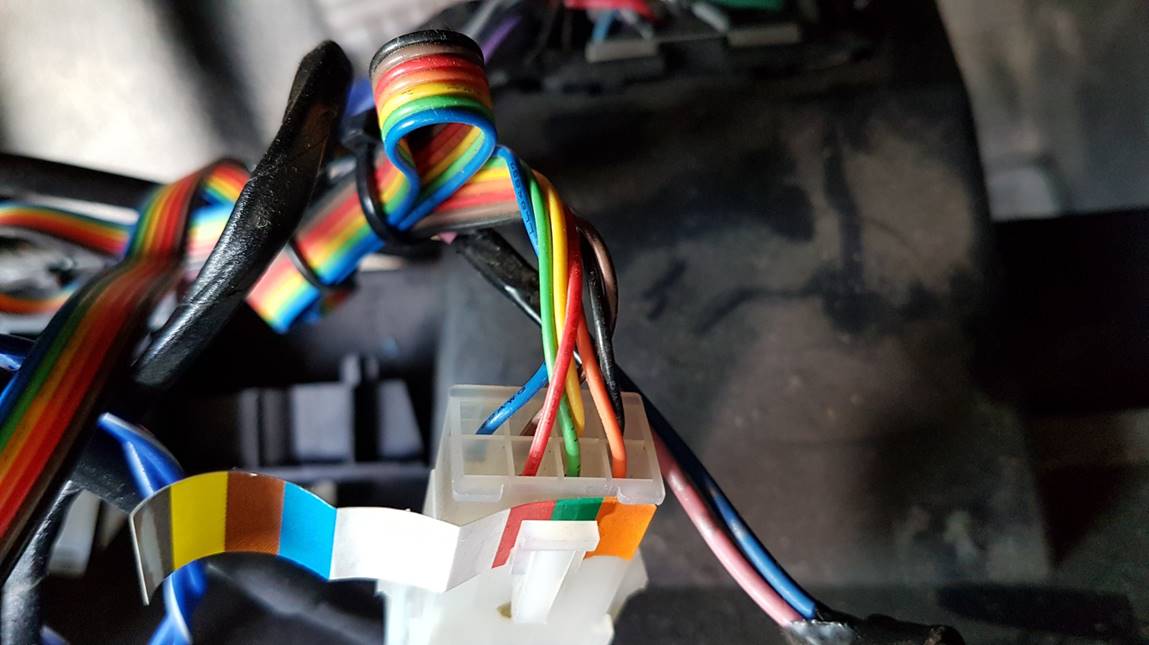
Now is a good moment to replacet he blind plates and install the buttons, the basket already has clips in the plastic for the wiring harness. It goes from the bottom anti clockwise around the basket. You can see I modified a JST connector to fit on the inside of the basket. The connector that comes with the wiring harness was not made for this clock harness. The red wire in the picture is for illumination, the 4 to the right are for the signal wires of the left and right button pieces. Ground is the aluminum basket.
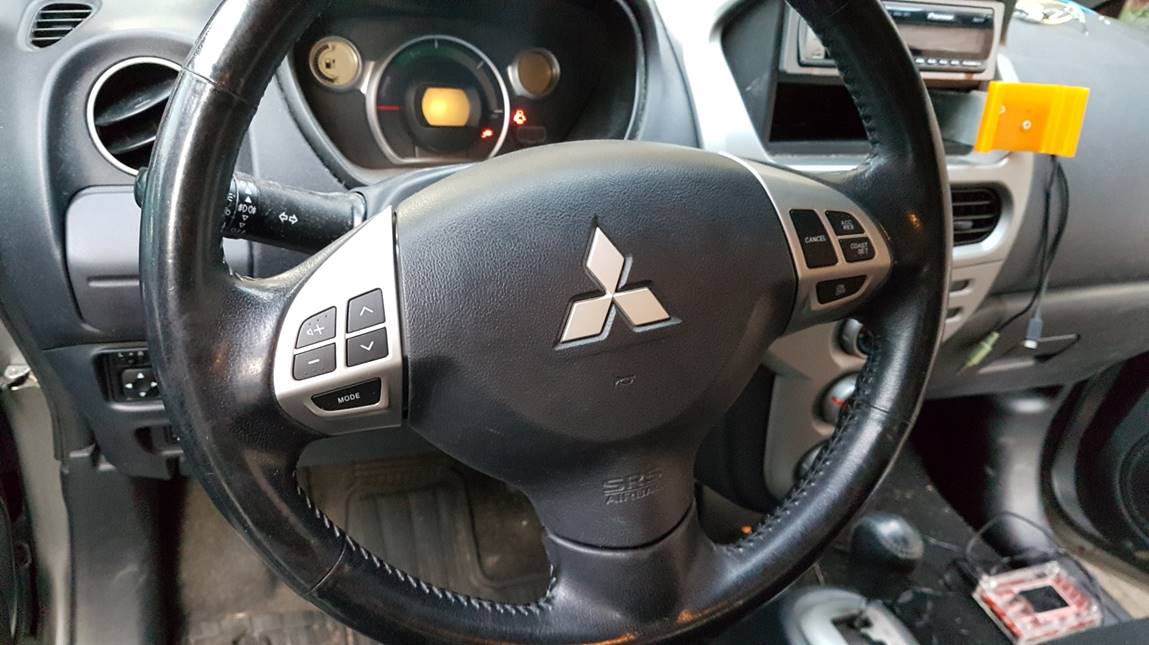
After installating the airbag again you end up with something like this.
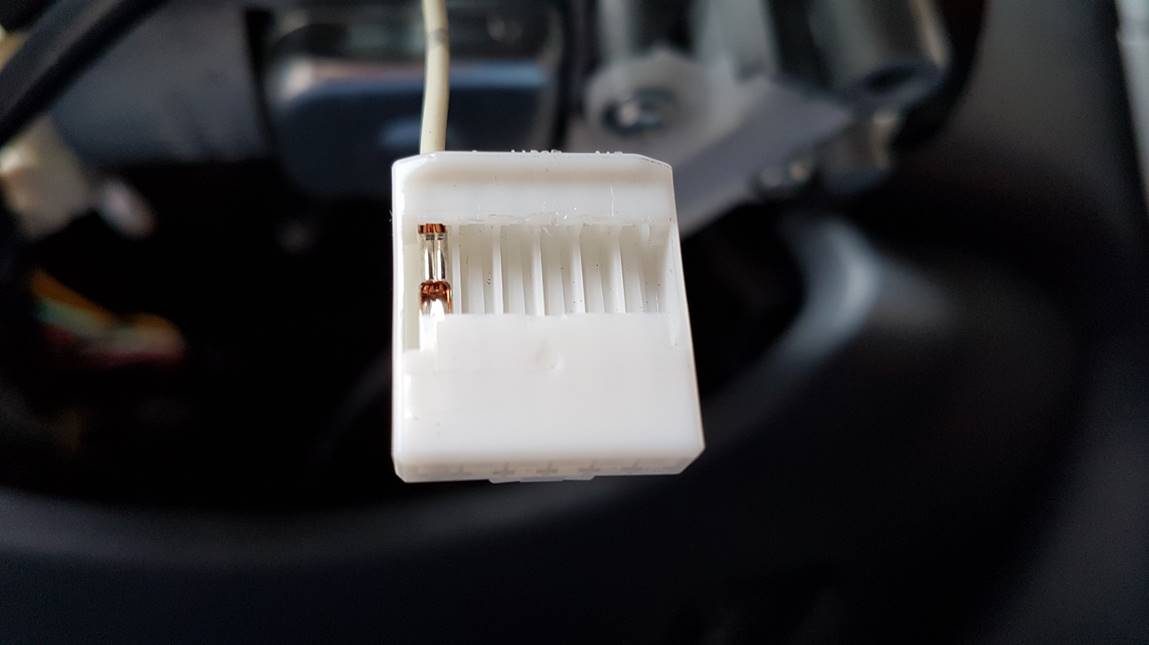
The connector under the steering column has just 1 wire (horn) and you need 5 more pins. It turns out that the wires from a floppy connector power supply are a decent fit for this connector, but not the right ones. I just happen to have these. There is a plastic clip you can remove to get this in, and make sure they stay in.
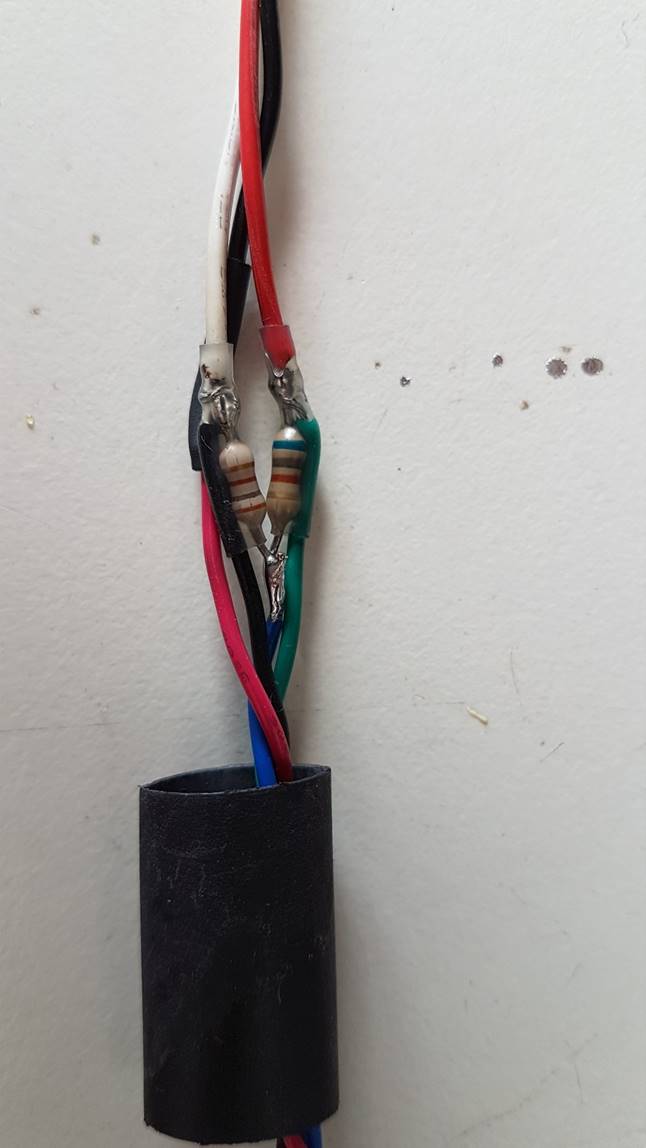
I managed to code up some Arduino/ESP32 software for this and left it on http://iserv.nl/files/pics/imiev/arduino including some schematics and KiCad drawings. I used 3 pin fan header connectors because I happen to have these spare. Because this is a simple resistor-button I can get away with 3 wires. I made a wiring harness for that ends up being the voltage divider network for the Cruise control buttons and the audio buttons. These are separate analog inputs.
You feed the buttons 5 volts on Arduino, or 3.3 on the ESP32. The return wire for the audio comes back in on the 680 Ohm to ground and the Cruise button on the 180 Ohm to ground. I should have used similar resistors really. Hindsight.
And you end up with something like this which doesn’t even have the MCP4151 yet for driving the Pioneer car stereo. But detecting the buttons works pretty well. I added a cheap 4 channel relay board to control the after market cruise control. This gives me galvanic isolation and the John Gold GoldCruise cruise control is happy with this method. (yay). For the diagrams I used the TLP222-2 from Toshiba which is a opto isolated Fet/Relay replacement. You need to flip the RELAYON/RELAYOFF levels for this though. It’s commented in the code.

For the JohnGold GoldCruise the connector has easy color coding. The orange is +12v. Connect orange to brown for on/off, orange to green for cancel and orange to yellow for up, and orange – 1500 Ohm – Yellow for down.
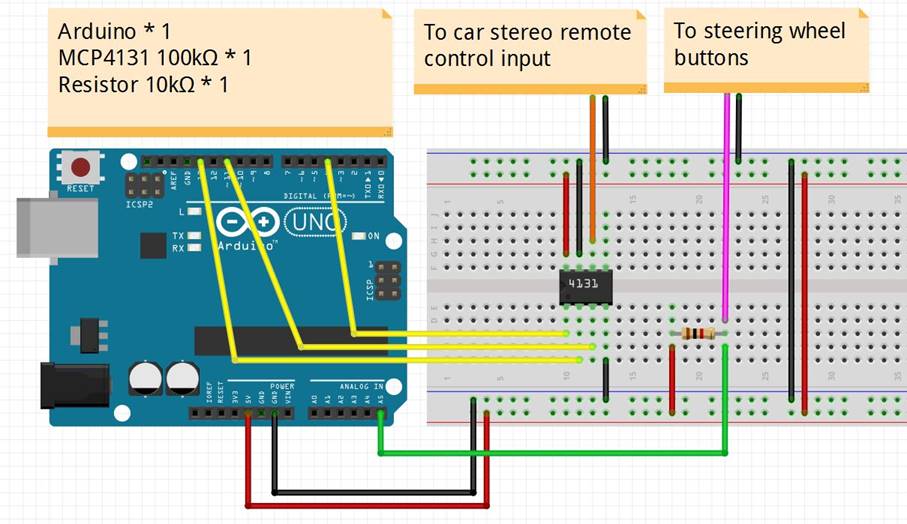
For the audio controls I borrowed the following diagram from the Arduino forum.
The basic code was ok, but I needed to handle another input so refactoring it was required. I made most things defines which makes it a bit easier. The code looks like this now. I shut down the MCP4151 using the TCON command so that radio doesn’t freak out and actually goes fully open. Theoretically II could just disconnect the wiper, but this works too. I ended up rebuilding this on a Arduino Nano 3 5 Volt, it’s not as accurate as the 12 bit ADC of the ESP32 but it’s good enough.
I never got the TLP222-2 packages in before I made this, so I have the clicky sound of the Relays as an audio feedback on the Cruise control buttons.